How To Prevent Certain Documents from Appearing on a Vendor Check Stub
GP TIP: Wondering how to prevent certain documents from appearing on a vendor check stub?
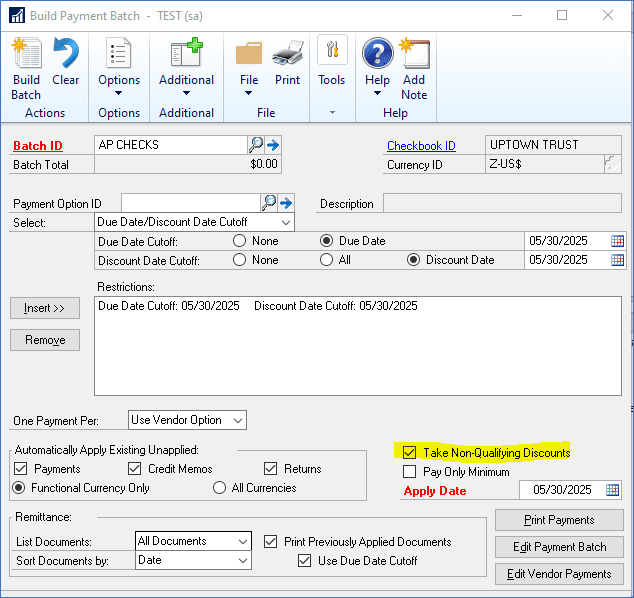
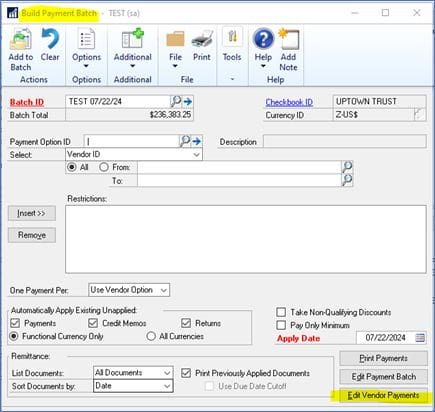
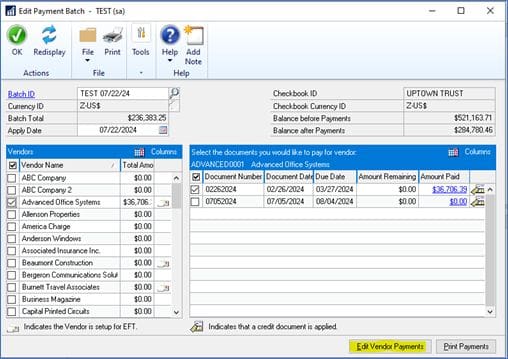
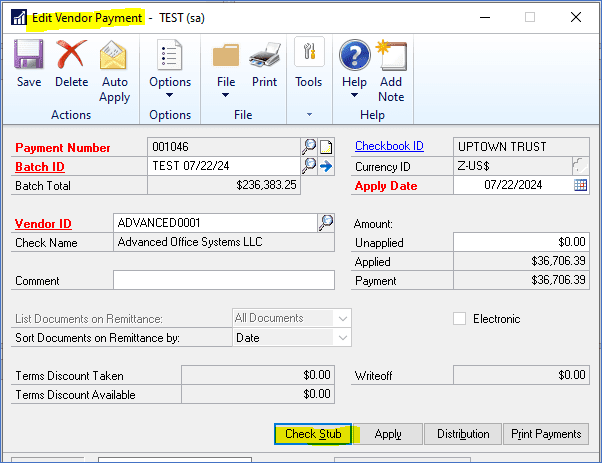
If you have fully applied documents that you do not want to print on a vendor’s check stub, you can go to the Edit Vendor Payment window.
This window is available in the Build Payment Batch window.
It is also available in the Edit Payment Batch window.
Or you can go to Purchasing > Transactions > Edit Vendor Payment.
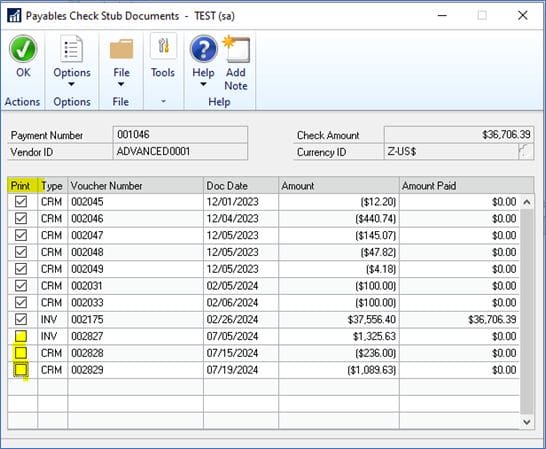
Click on the Check Stub button at the bottom of the window and uncheck the checkboxes beside those documents that you do not want printed on the check stub.
Need More GP Technical Support?
If you need help or training with GP, please contact CSSI to discuss your needs.
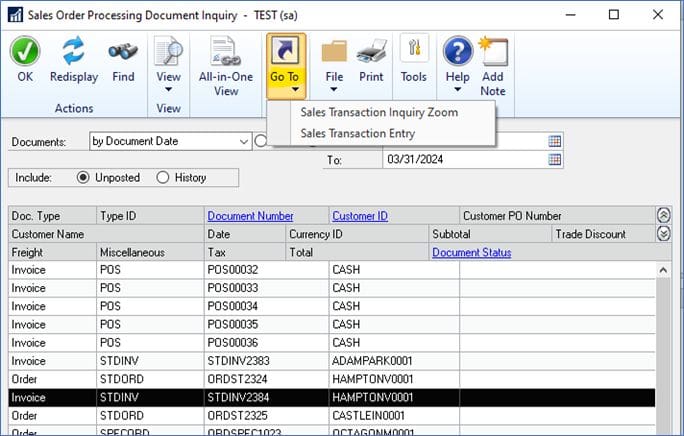
A’ Go To’ option has been added (also in GP 18.4) to the Sales Order Processing Document Inquiry and the Sales Document Range Inquiry windows to view a document in either the Sales Transaction Inquiry Zoom or Sales Transaction Entry window. To get to these windows, go to Sales > Inquiry and select either Sales Document or Sales Range Inquiry.
Select a document then click on the “Go To” button and select which window you want to use to view the document.
Ever wonder how to turn off those pesky Posting Journals that no one ever looks at, … or that you print to the screen or cancel?
Here’s how to do it!
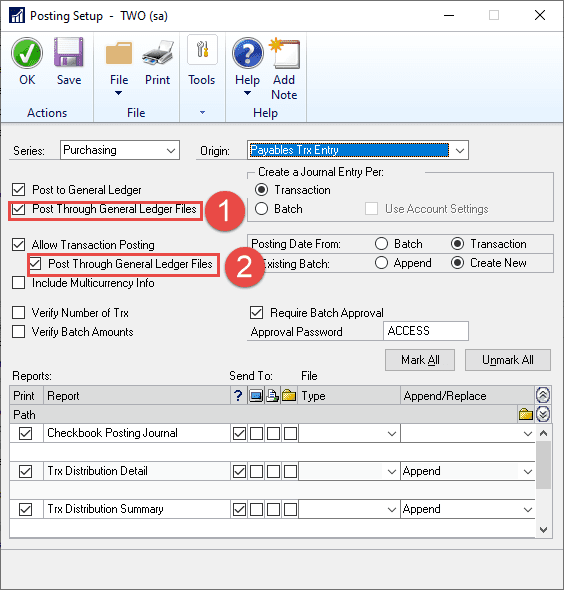
Go to Microsoft Dynamics GP > Tools > Setup > Posting > Posting
Select a Series and an Origin
The list of Reports that appear will all be related to whatever Series and Origin you select
Uncheck in the Print column to not print the report at all
Or choose an option in the Send To columns to set a default destination
The question mark column means to Ask Each Time
The column with the monitor icon means to always print to the screen
The column with the printer icon means to always print to the printer
The file folder icon means to always print to a file. If you choose this option, you will then choose Type of File, File Location and Append or Replace the file. (Tip: this is not usually a very helpful option as most GP reports do not look in any of these formats.)
NOTE: Be careful not to change any of the other options in this window as this will affect how transactions post to the general ledger!
Do you have inventory items that you would like removed? Did you know that there is a process to accomplish this in Dynamics GP? Here’s how:
You can start preparing items to be removed during the year-end process by changing the item type to Discontinued. Go to Inventory > Cards > Item. Change the Type to Discontinued.
Items are tracked the same as Sales Inventory items in that you can still sell Quantities On Hand. You can also enter adjustments for the item and can delete the item when the quantity reaches zero.
You can also remove Discontinued items during the Inventory Year-End process.
Mark this option to remove the records for discontinued items that have been completely sold. Items assigned the discontinued item type will be removed from the item records during the year-end closing process, unless there are quantities of the item, or one of the following is true:
The item does not exist on an open transaction (sales document, purchase order, unposted inventory transaction).
The item is assigned to a kit.
The item is a component of a bill of materials.
The item has one or more bills of materials of its own.
If you or any of your GP users get a script error, like the one below, when they log into GP, it has to do with a setting on your GP Home Page.
Click on No many times until the error goes away. Then click on “Customize this page” in the upper right-hand corner of the Home Page.
Uncheck the Connect checkbox.
Or you can disable the Connect option one user at a time by running the SQL script below against the DYNAMICS database. (Replace ‘xxxxxx’ with the GP user ID.)
UPDATE SY08100 SET Visible = 0 WHERE SectionID = 6 AND USERID = ‘xxxxxx’
If you want to disable it for all users just omit the last line that filters by a specific user ID.
Get More Help With GP
We hope this helps you solve GP script errors at the login screen. For more GP support, training, or upgrade help, please contact CSSI.
As a GP / Great Plains consultant for over 20 years, CSSI keeps tabs on Microsoft’s software roadmap. You may have noticed lots of marketing around Microsoft’s Dynamics 365 Business Central, and you may have felt some pressure to migrate. While CSSI will be here to support you if and when you decide to migrate, be aware that you do not need to do so in any currently foreseeable future.
Why Dynamics GP / Great Plains Remains So Popular
The community of Great Plains users is remarkably dedicated and passionate. Did you know that GP is used by over 20,000 customers?
Great Plains remains popular for many reasons:
GP meets the customer’s requirements.
Over time, the customer has integrated GP add-ons and customizations to create a highly specialized accounting system perfectly suited to its business needs.
The customer does not foresee benefits from migrating to a cloud-based ERP environment. In fact, the higher costs of cloud hosting become prohibitive.
Customers who do not regularly update to new GP versions do not want to be forced to do so.
Microsoft’s Commitment to Great Plains / GP
This past April, Microsoft made an announcement on the future of Microsoft Dynamics GP.
Their announcement states that, as of April 1, 2026 (3 years from now), there will be no new customer sales of Dynamics GP. As a steppingstone to this, from April 2025 there will be no new sales of GP Perpetual licenses. Subscription sales can still happen for the additional year.
HOWEVER, this will have no implications for existing customers! Existing customers can continue to purchase new licenses and modules after 2026. There will still be tax and other product updates for Dynamics GP, including lots of new features already planned for the next version (18.6), due to release October 2023. And this will continue with future versions 18.7, 18.8, etc.
Therefore, for existing Microsoft Dynamics GP customers, nothing has really changed. Microsoft has committed to continuing support and development of Dynamics GP to 2028 and beyond.
How CSSI Can Help You with GP
CSSI is pleased to support the community of 20,000 companies using Great Plains. We plan to continue to support GP for as long as our customers need us.
For help with Great Plains, please contact CSSI. We’d be pleased to help with friendly, practical GP support.
Does your company spend more than 4-hours a month working on bank or credit card reconciliations? If so, check out this pre-recorded webinar for a GP add-on which will be of interest to you. Watch ‘Automation Made Easy’ and see how Easy e-Bank Rec works symbiotically with Dynamics GP and offers automation, matching, recording bank transactions and reconciling to make month-end less stressful for everyone.
Have you ever thought that you could save time (and wasted clicks) by customizing your GP home page to suit your specific needs? Did you know that it is indeed possible?
The CSSI GP team has prepared this brief tutorial to show you how…
How to customize your GP Home Page
1 – How to change Navigation Pane Options
Did you know that you can remove navigation pane options that you never use? Or, that you can rearrange them?
Click on the small double right arrow in the lower right-hand corner of the Navigation pane and select Navigation Pane Options.
Uncheck the options you don’t want to appear and/or select an option and click on the Move Up or Move Down buttons. Click on OK when finished.
2 – How to customize the Toolbar
You can add icons to the toolbar at the top of the GP screen for easy access to many GP windows
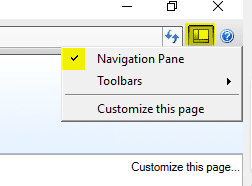
Click on the Layout icon in the upper right-hand corner or press Alt+L or right-click in the blank space of the toolbar. (This is where you can also choose whether or not to display the Navigation pane.)
The Main option displays Transactions, Inquiry, Reports and Cards
The Standard option displays SmartList, Task List, Reminders and My Reports
Select any of the module options to display transaction entry and posting icons for each module
To add any other icons, put a checkmark beside the Custom option. Bring up the Layout menu again and select Customize.
Choose which toolbar to modify then click on Add to find the window to be added.
In the Controls box, select an item then click on Modify Selection to change a Name, change a button image, insert a divider line and select to display Image Only, Text Only or Image and Text.
3 – Quick Links
Add Quick Links to display links to GP window, web pages and/or external files (such as Excel or Word documents)
Move the cursor over the Quick Links bar and select the pencil icon
Click on Add and choose an option in the drop-down list
Click on Modify to change the name of an existing quick link
Use the Move Up and Move Down buttons to rearrange quick links
To insert a divider line, click on Add > Web page and fill in dashes in the Name and Address fields. Use the Move buttons to rearrange the position of the divider line.
4 – Shortcuts
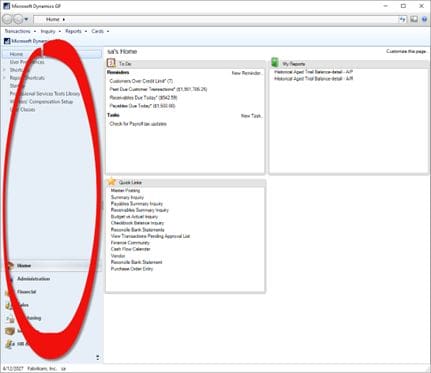
Shortcuts are displayed in the upper part of the Navigation Pane on the Home Page. Use Shortcuts for quick access to any GP window, SmartList Favorite, GP Macros, Web Pages or External Applications.
Right-click anywhere in the blank space of the Shortcut bar and select Add. Select an Add option.
Choose Add Window to add a GP window. Scroll down and click on the plus sign to the left of Microsoft Dynamics GP. Expand a module to find and select a window within that module. Click on Add then Done.
You can also add windows from any GP add-on modules or third-party products.
Add Folders to organize your shortcuts
5 – My Reports
You can add reports to the My Reports section of the Home page in one of two ways: (1) from the Home Page or (2) from within a Report Option
To add a report from the Home page, click on the Add Reports link
To add a report from within a Report Option, click on the My Reports option.
FYI:The due date for providing Forms 1095-C to employees was extended to March 2, 2018. The IRS filing deadline of forms 1094-C & copies of the 1095-Cs remains the same: paper filing needs to be done by Feb 28, 2018 and electronic filing (required for employers with more than 250 1095-Cs) must be done by April 2, 2018.
Or, if you edited the tax tables manually, here’s a screenshot of the Married Annual FED tax table.
Do you have questions? Contact CSSI at 570-524-4424
Interested to learn more about customizing your GP home page and other useful tips for GP? Need GP support from CSSI Technologies? Contact us:
It’s the end of the year and you are trying to encourage your Microsoft Dynamics GP users into staying logged out of company related windows as you work to complete year-end close. You send blast emails, make calls and even send a few instant messages to schedule the process, yet you still find that there are folks that just didn’t get the memo. This same scenario also crops up when you try to perform file maintenance, even though it is often scheduled and thoroughly communicated. After the battery of unread emails, missed calls and so on, you find yourself wishing there was an easier way.
Microsoft heard your pleas and added a feature in Microsoft Dynamics GP 2013 R2 that allows you to take a company offline. This should help keep your busy bee Microsoft Dynamics GP user’s company activity to a minimum during year-end close and for file maintenance. Continuing to schedule these procedures along with this feature should help minimize interruptions and frustration.
As you know, new features are released all the time in the software world. Mass emails are typically sent out to make users aware of the changes, the benefits, and how they can increase productivity. But new tools are only beneficial if you know how to use them, and we all know that between meetings, conference calls, and other things that flood our busy workday, it’s not always easy to keep up.
CSSI Technologies is here to help. We’ve created an easy-to-use, comprehensive guide on how to take a company offline in Microsoft Dynamics GP.
1) Start by going to Administration > Utilities >System >Take Company Offline. Select a company and click on the Insert button to move the company to the Offline Companies section. You can insert multiple companies one at a time, or use the Insert All button to insert all companies.
Pro Tip: When you select a company in the Offline Companies list, you can see how many Current Users are logged into that company. Click on the blue hyperlink “Current Users” to see the list of User ID’s.
2) You can establish a message that will be shown to any user that attempts to log in to a company after it has been taken offline. Select “Default” to utilize the default message, or “Custom” to provide additional information to users. Users that are currently working in the company until they log out. Once they log out, they will only be able to log back in to the company if they have offline access.
3) Once you are finished, click on the OK button in the bottom right-hand corner.
If users are logged into the companies that are being taken offline, a message appears asking if you would like to send those users a message.
4) If you click “Yes,” the Send Message window appears.
5) Users will see either a “Task” on their Homepage:
Or they will receive a popup message:
6) When users try to log back in, it will be indicated that the company is offline in the Company name:
7) If they select the offline company, they will receive this message:
Earlier, we mentioned that the only way a user could continue working in an offline company was if they were granted offline access. Here’s how to grant a user offline access:
8) Go to Microsoft Dynamics GP > Tools > Setup > Company > Company. Once you’re on the Company Setup screen, specify the user you would like to set up by entering the User ID in the “User with offline access” field. Be sure to click OK in the bottom right-hand corner to save your changes.
While this feature is very easy to configure, the CSSI team still recommends scheduling year-end close and file maintenance. With the support of our team and this Microsoft Dynamics GP feature, we hope that your year-end and scheduled file maintenance procedures will become frustration free and painless. If you have any questions, our Microsoft Dynamics GP support team is always happy to help! We can be reached at [email protected] or at 570-524-4424.
Did you find this GP info helpful? Join our mailing list for more pro tips and info…