Here’s a new Dynamics GP feature which was added in the GP 18.4 release – how to save inquiry window sort options.
This option is available in the following windows: Receivables – Transaction by Customer, Receivables – Transaction by Document, Sales Item, Payables – Transaction by Vendor, Payables – Transaction by Document, Bank Reconciliation – Checkbook Register, Checkbook Balance.
Select your default Sort by option then click on View > Save Window Preferences.
In addition to the sort options being saved, the “Include” Type (Work/Open/History) will be saved, along with the size of the window if you change it.
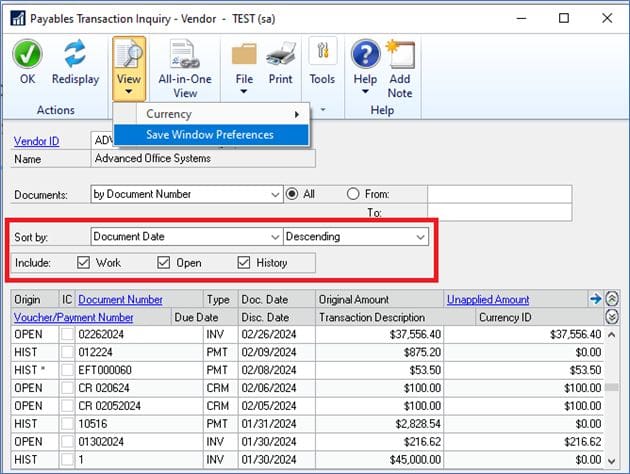
These saved default settings are per individual user and are system wide, so the saved setting will default for any company that user logs into.
Need More Help with GP?
Hope that learning how to save inquiry window sort options is helpful for you! For GP technical support or help with upgrades, please contact CSSI.