Understanding GP User Licenses

Getting a ‘Maximum Users Logged In’ Message?

Do you or any of your users have trouble logging into GP sometimes because the maximum number of users are already logged in? Maybe you need to review which users are performing which tasks.

The 3 Types of Users In Dynamics GP

  1. Full User.  This is the most common type of user.  This user has full access to do anything in GP, but they are limited based on the security permissions assigned to them within GP.
  2. Limited User.  These users can view data only, with inquires, reports and SmartLists.  They cannot post transactions or change master records.  PLUS, the cost of a Limited User is 80% less than the cost of a full user.
  3. Self Service.  These users can only access the Self Service modules, which are used to enter PO requisitions, payroll expenses and timecards, and project expenses and timesheets.

You can see which users are currently logged into GP by going to Administration > Utilities > System > User Activity. Here you can remove (Delete) users who should be logged out.

Keep in mind that, with the use of refreshable Excel spreadsheets, you can have non-GP users viewing GP data outside of the system.

Need Help With GP User Licenses?

For help with your Dynamics GP user licenses, please contact us at CSSI.

Using GP Safe Pay (Positive Pay)

This is a repeat of a tip we published in February of 2022 but, with the rise in the number of check fraud cases, this may be a good time to start using Safe Pay (also known as Positive Pay).

Microsoft Dynamics GP has this built-in tool to assist in the prevention of check and ACH fraud. It’s a process that involves creating a file of payables payments (checks and EFT’s) that you submit to your bank.

Any payments presented to your bank are compared to your company’s issued Safe Pay file. If a payment does not match the information in the file, your bank will contact you for authorization.

If you do not see this option in your GP, then it either needs to be installed and/or registered.

It requires a few setup steps. You first need to contact your bank to confirm that they offer this service and then ask them for file specifications. This file format gets created in GP by going to Financial > Routines > Safe Pay > Configurator, where you select an Output file Type and define the types of records lines and record fields per line.

Next, go to Financial > Routines > Safe Pay > Upload Maintenance. Select the Bank Upload ID (Bank Format) that was created in the first step. Link it to a Bank ID and a Checkbook ID. Select the Upload Filename and Path where you want the file to be created. The same file name will be used every time. (The file gets overwritten each time you create a new file. Have no fear, though, you can always recreate a file from history.)

If you are using EFT processing in GP, be sure to check the “Include EFT Transactions” checkbox at the bottom of the window.

Once you are ready to create a Safe Pay file, after you have posted a batch of payments, go to Financial > Routines > Safe Pay >Transaction Upload. Select the Bank Upload ID. Enter a Last Upload Date and Upload Cutoff Date. Click on the Load/Reload Transactions button. The payments to be included in the file will appear. Click on Upload to create the file.

Click on Proceed when the window below appears.

Click on OK again.

If your bank provides you with a confirmation number when the file is submitted, you can enter that in the next window. If you do not have a confirmation number, just enter any number then click on Successful.

You can then print a report listing all the payments that were included in the file.

To recreate a Safe Pay file, go to Financial > Routines > Safe Pay >Transactions History. Select your Bank Upload ID. Click on the left and right arrows to scroll through previously created uploads. Click on the Upload button the recreate the file.

Need More GP Support?

For more helpful Dynamics GP support, contact the pros at CSSI. We’d be happy to help. Get GP help here.

Monitor your data with GP Home Page and a SmartList

Use your GP Home Page and a SmartList to help you monitor your data. Use reminders to view customers who have gone over their credit limit. Or use a reminder to list all inventory items that have a on hand quantity that is below the item’s reorder limit. Or keep an eye on purchase orders created that exceed a certain dollar amount.

First, create a new SmartList favorite that displays the columns you want to see and that is filtered on whatever criteria is needed.

Let’s work with the example of seeing all purchase orders over a specific dollar amount.

First create the SmartList favorite that will give you the information you need, such as what is shown in the screenshot below.

This list is filtered on

  1. “Released” PO’s only, meaning they have been printed but not yet received or invoiced.
  2. PO’s with a Remaining Subtotal greater than $5,000

PO Status not equal to “Canceled”

Once your new SmartList favorite is displaying the information that you want, now we can save it as a Reminder on your Home Page.

Click on the Favorites button. Enter a new Name then click on Add and select Add favorite and reminder.

In the Custom Reminder window, under Remind me when, select Number of Records, choose “is greater than” and enter 0. This means show my SmartList as a reminder only when it’s returning more than 0 records (rows). Click on OK.

Go to your Home Page. You may need to refresh it if you had been on the Home Page while creating your reminder. You can refresh your Home page by clicking on the double blue arrows in the upper right-hand corner. Or go to another page then come back to the home page.

Here is my new Reminder on my Home page. The “3” in parenthesis indicates that I have 3 records on the SmartList. I can click on it and it will take me right to that SmartList.

Need GP Help?

For additional help and training with GP, please contact CSSI.

Dealing With Vendor Rebates & Refunds in GP

Here’s an easy way to handle cash received from a vendor, whether it’s a vendor rebate or a refund of an overpayment. Use the Return document type in Payables Transaction Entry.

Go to Purchasing > Transactions > Transaction Entry and change the Document Type to Return. Fill in all the header information as usual: Document Date, Vendor ID, Document Number, etc.

Enter the amount received from the vendor in both the Returns and the Check fields.

Once you tab off the Check field, the Payables Check Entry window opens where you select which Checkbook ID this payment will be deposited in. You can also enter the vendor’s check number here. Click on OK when finished.

Then, click on the Distributions window to verify the GL accounts that will be posted to. The CASH account defaults from the Checkbook ID selected above. The PURCH account defaults from the Purchases account assigned to the vendor but it can be changed. (Never change the CASH GL account as it’s assigned to the checkbook.)

Once the return is posted, it will be waiting to be deposited in the Bank Deposit Entry window.

You can see in the Payables Transaction Inquiry window that the Return transaction has been fully applied and, therefore, moved directly to History.

Need GP Help?

For additional help and training with GP, please contact CSSI.

Fiscal Period Closing

Did you know that Dynamics GP enables you to prevent users from posting to prior fiscal periods by closing fiscal periods? Here’s how to take advantage of the feature.

Go to Microsoft Dynamics GP > Tools > Setup > Company > Fiscal Periods.

Also be sure to close all the periods for a year that has just been closed. Because GP allows you to post back to the last closed year, you’ll want to be sure all the periods and modules are closed for that year.

You can always go back and uncheck a period to temporarily reopen it.

You also have the ability to leave just one particular type of transaction open. Click on the Mass Close button (highlighted above). Select a Series and Origin and reopen a period for just that transaction type.

Need GP Support?

Do you need help in implementing GP features or training your team? Contact CSSI for GP help today.

Using GP to Reprint W-2 Forms

For GP payroll processors, did you know that you can reprint a W-2 form from a prior year? Just go to the Print W-2 Forms window and select a prior year. Select an employee in the From and To Employee ID fields. Select to print W-2 forms and select a Form Type. Click on Print.

Reprint Prior Year W-2

We hope you found this tip on reprinting prior W-2 forms to be helpful. For additional GP support on this or any GP topic, please contact CSSI.

Making Use of GP’s Quick Print

If you’re creating sales orders and printing several documents at once (sales order, picking ticket and/or packing slip), that requires a lot of mouse clicks. Instead, you can use what’s called the SOP Quick Print functionality. This is a built-in macro that you set up to print the various documents you need.
In the Sales Transaction Entry window, click on Options > Quick Print Setup. Choose the documents to print, number of Copies of each, print options, and Print Destination. Click on Save when finished.

GP Quick Print

We hope this GP tip is helpful. If you need additional support, please contact CSSI to discuss.

Controlling the Posting of Future-Dated Transactions in GP

This is a free tool that is part of the Professional Services Tools Library (PSTL) toolkit. It prevents the posting of future-dated transactions in subsidiary modules.

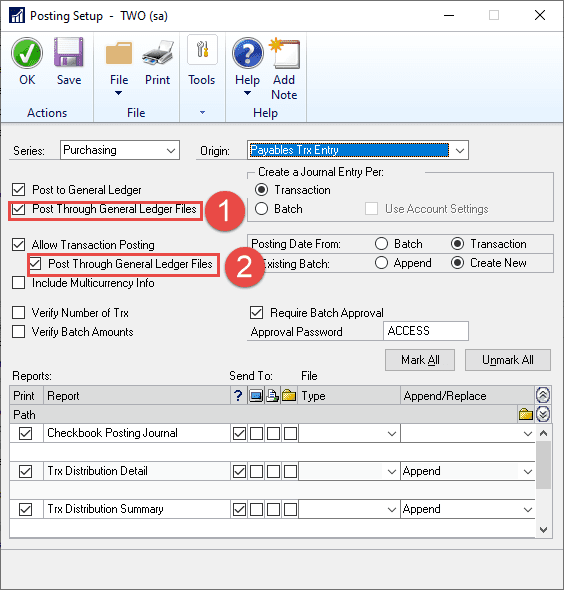
If your Posting Setup is set to post to G/L by batch date, GP would allow a document date to be used even though that fiscal period is not yet set up in GP.

If the Posting date is coming from the batch ID, then GP would accept an incorrectly entered Document date. In the example below, the document date contains a typo. But it posted to AP! And it won’t appear on an aging report as of the current date.

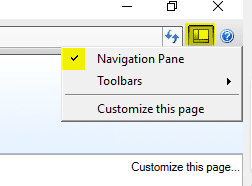
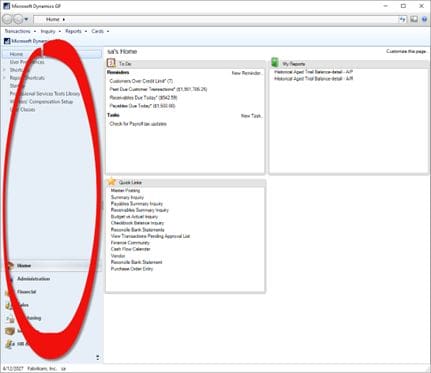
To prevent this, enable Doc Date Verify. Launch PSTL by selecting it from the GP Navigation Pane.

In the Misc. Tools section, click on both the radio button and the check box next to Doc Date Verify. Click on the X in the upper right-hand corner when finished.

This must be enabled on each workstation.

Once this is enabled, any time a future date is entered into a transaction, you’ll get the error message below.

Doc Date Verify works in the following windows:

  • Payables Transaction Entry
  • Receivables Transaction Entry
  • Invoice Entry
  • Payables Manual Payment Entry
  • Sales Transaction Entry
  • Inventory Transaction Entry
  • Cash Receipts Entry
  • Purchase Order Entry
  • Receivings Transaction Entry
  • Purchasing Invoice Entry

Get Help With GP

We hope that this tip is helpful for you. To get more help with GP, please contact CSSI. We can support your upgrades, enhancements, and team training.

GP Tips For G/L Account Setups

To be sure that your general ledger year-end closing process runs smoothly, you should confirm that any new G/L accounts added during the year were set up properly.

You can use a SmartList to do this.  Open SmartList and go to Financial > Accounts.  Include the “Posting Type” and “Typical Balance” columns.  If either of these fields are incorrect for an account, it will not get closed correctly.  For instance, if a balance sheet account is set up as a profit and loss account, the account balance will be zeroed out during year-end closing.

Also add the “Created Date” column.  This way you can filter the list to only include new accounts added during the current fiscal year (as shown below in the Search window.)

To fix an account, simply double-click on that account and the Account Maintenance window will open.  Make the necessary change, save the account then Refresh the SmartList.

Get Help With GP G/L Account Setups

Need support or training for GP? The team at CSSI stands ready to help you. Please contact us to discuss your GP issues.

Field Level Security In GP

This is a tool that’s been around forever but is hardly ever used. This allows you to control user access and edit abilities at a field level in Dynamics GP windows.
1. Go to Administration > Setup > System > Field Level Security
2. Click on the Add button at the bottom of the window to create a new ID
3. Enter an ID (15 characters max) and a Description
4. Click on the magnifying glass to the right of Product
5. Click on the plus sign to the left of Microsoft Dynamics GP (or any other product) to expand the list of modules
6. Expand a module
7. Expand the window that you want to add a restriction to and select a sub-window.In this example, we’re going to disable/gray out the Hold checkbox in the Customer Maintenance window.

8. Double-click on the Hold field on the right-hand side
9. Select the Disable Field Security Mode

Security Mode Options: Password Before: You must enter a password before getting access to a field Password After: must enter a password after modifying a field for the changes to be saved. Warning Before: A warning will be displayed and access to that field will be denied. Lock Field: You can’t use or modify the field. Disable Field: The field will be displayed but it will be grayed out. Hide Field: The field won’t be displayed. Password Window: You must enter a password before access to the window is permitted. Disable Window: Enter the system administrator’s password to have access to the window. 10. Click on Save
11. Back in the main Field Level Security window, click to select a Company on the right
12. Select a User ID
13. Click on Apply
14. Click on OK

Get Help With GP

Need help of support with GP? Please contact CSSI for expert assistance!