Big news in November of 2021: Microsoft has announced the release of the 2021 year-end update for Dynamics GP.
What’s In the 2021 GP Update
This Microsoft Dynamics GP update is ALL inclusive of prior patches and includes the following changes.
- Payables NEC, 1099-MISC, 1099-DIV form changes
- Payables 1096 form changes
- Fixed Assets – luxury auto depreciation changes
- Payroll 1099-R form changes
The update has no changes to W-2 Forms or electronic filing.
Learn more about the 2021 GP update in this Microsoft Dynamics GP post: https://community.dynamics.com/gp/b/dynamicsgp/posts/microsoft-dynamics-gp-u-s-year-end-update-2021-released
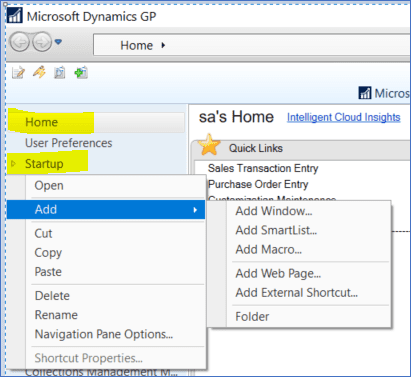
Should You Update Dynamics GP?
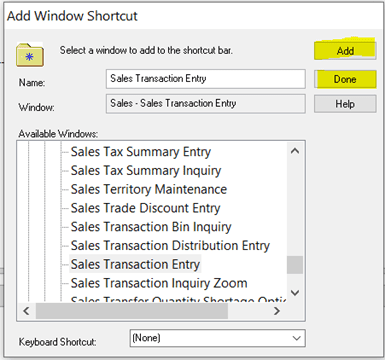
If you plan on printing 1099 forms from within GP, then you will need this update. You will not be able to get by with the modifying the form in Report Writer. You’ll need the updated program code and the form change to print from within Microsoft Dynamics GP.
After the 2021 update is installed, if you have security access to a modified version of any of these 1099 Payables forms, make sure to print the original form versus a prior-year’s modified form, or you will not see the new changes in this update.
Getting Help With the 2021 GP Update
The 2021 GP update can be installed at any time. If you’d like Microsoft partner and GP expert CSSI Technologies to install the update for you, please contact us so that we can get you scheduled. CSSI also provides Dynamics GP support. Year-end is a very busy time and our calendar fills up fast!