Issue Checks To Vendors Prior to Receiving the Items
Did you know that Dynamics GP has functionality allowing you to create a check to a vendor against a PO prior to receiving the items and posting the invoice? Here’s how to do it:
1. Set up the PO module to allow prepayments
- Go to Purchasing > Setup > Purchase Order Processing
- In the Prepayment Setup section, check the Allow Purchase Order Prepayments box.
- You can require a password by filling in the Prepayment Password field.
- Assign a Prepayment G/L Account for the prepayment to post to.

2. Create a purchase order and the prepayment
- Create a PO as usual
- Fill in the Prepayment amount
- The not-equal sign (≠) means that the prepayment amount has not yet been paid
- You can enter a prepayment for a New, Released, or Change Order purchase order that hasn’t been received or invoiced against.
- You can only enter one prepayment for each purchase order.

- You can click on the blue arrow to the right of the Prepayment amount to change the default Prepayment Account and/or select Manual Payment instead of Computer Check.
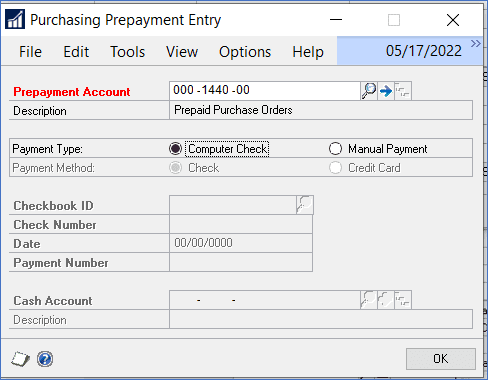
- Print and save the purchase order
3. Create the prepayment check
- Go to Purchasing > Transactions > Build Payment Batch
- Create a Batch ID
- In the Payables Batch Entry window, check the Purchasing Prepayment Batch box
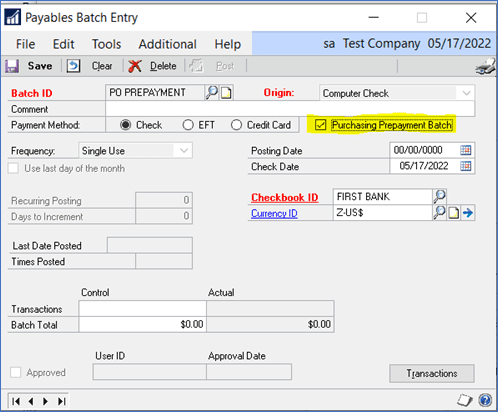
- Select the Checkbook ID then Save
- Next you have several options. You can select the PO Number(s) to be paid. Or you can just click on Build Batch and GP will create a batch of all PO prepayments.
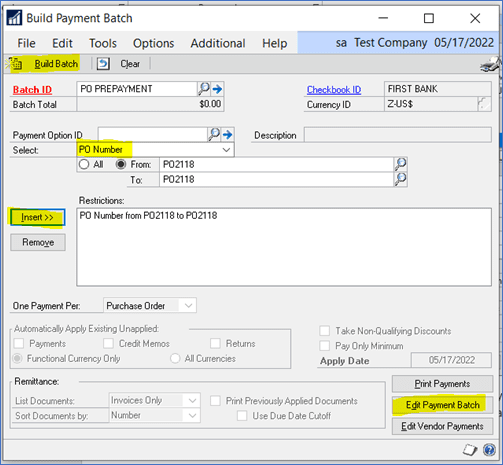
- Or you can click on Edit Payment Batch and only those vendors who are getting prepayments will appear.
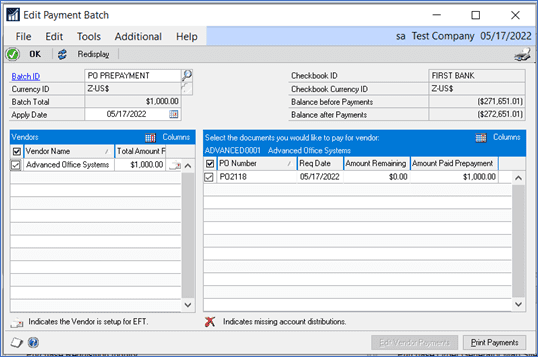
- Click to Print Payments. The PO number will be printed on the check stub.
- Post the batch.
- The check transaction(s) will debit Cash and credit the Prepayment account.
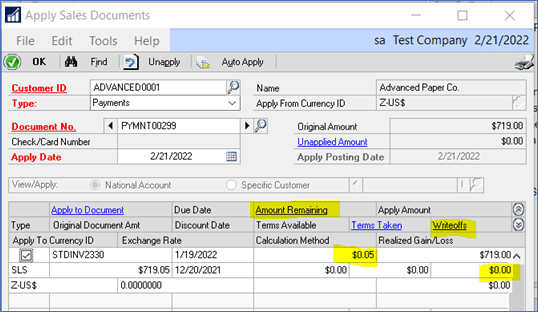
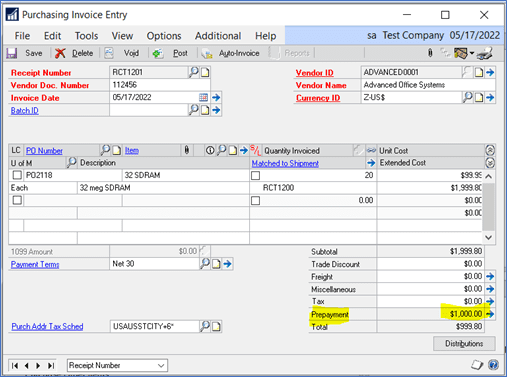
4. When you create the PO Invoice, you’ll see the Prepayment amount reduces the Total invoice amount.
- When you post the invoice, the Prepayment account will be debited
How To Get More Help
Do you have questions or need more help with purchase order prepayment or any other GP feature? Contact the GP team at CSSI, we’d be happy to help.