There appears to be continual confusion in the marketplace regarding the future for Microsoft Dynamics GP ERP software. This is partly due to confusion caused by Microsoft’s several products under the ‘Dynamics’ umbrella, partly due to intentional misinformation spread by competitors, and partly due to poor communication from the Microsoft team itself. Rumors circulate that GP has been replaced by Dynamics 365 Business Central, and that GP is on the way out. Not true!
Dynamics GP Will Be Supported To 2028 and Beyond
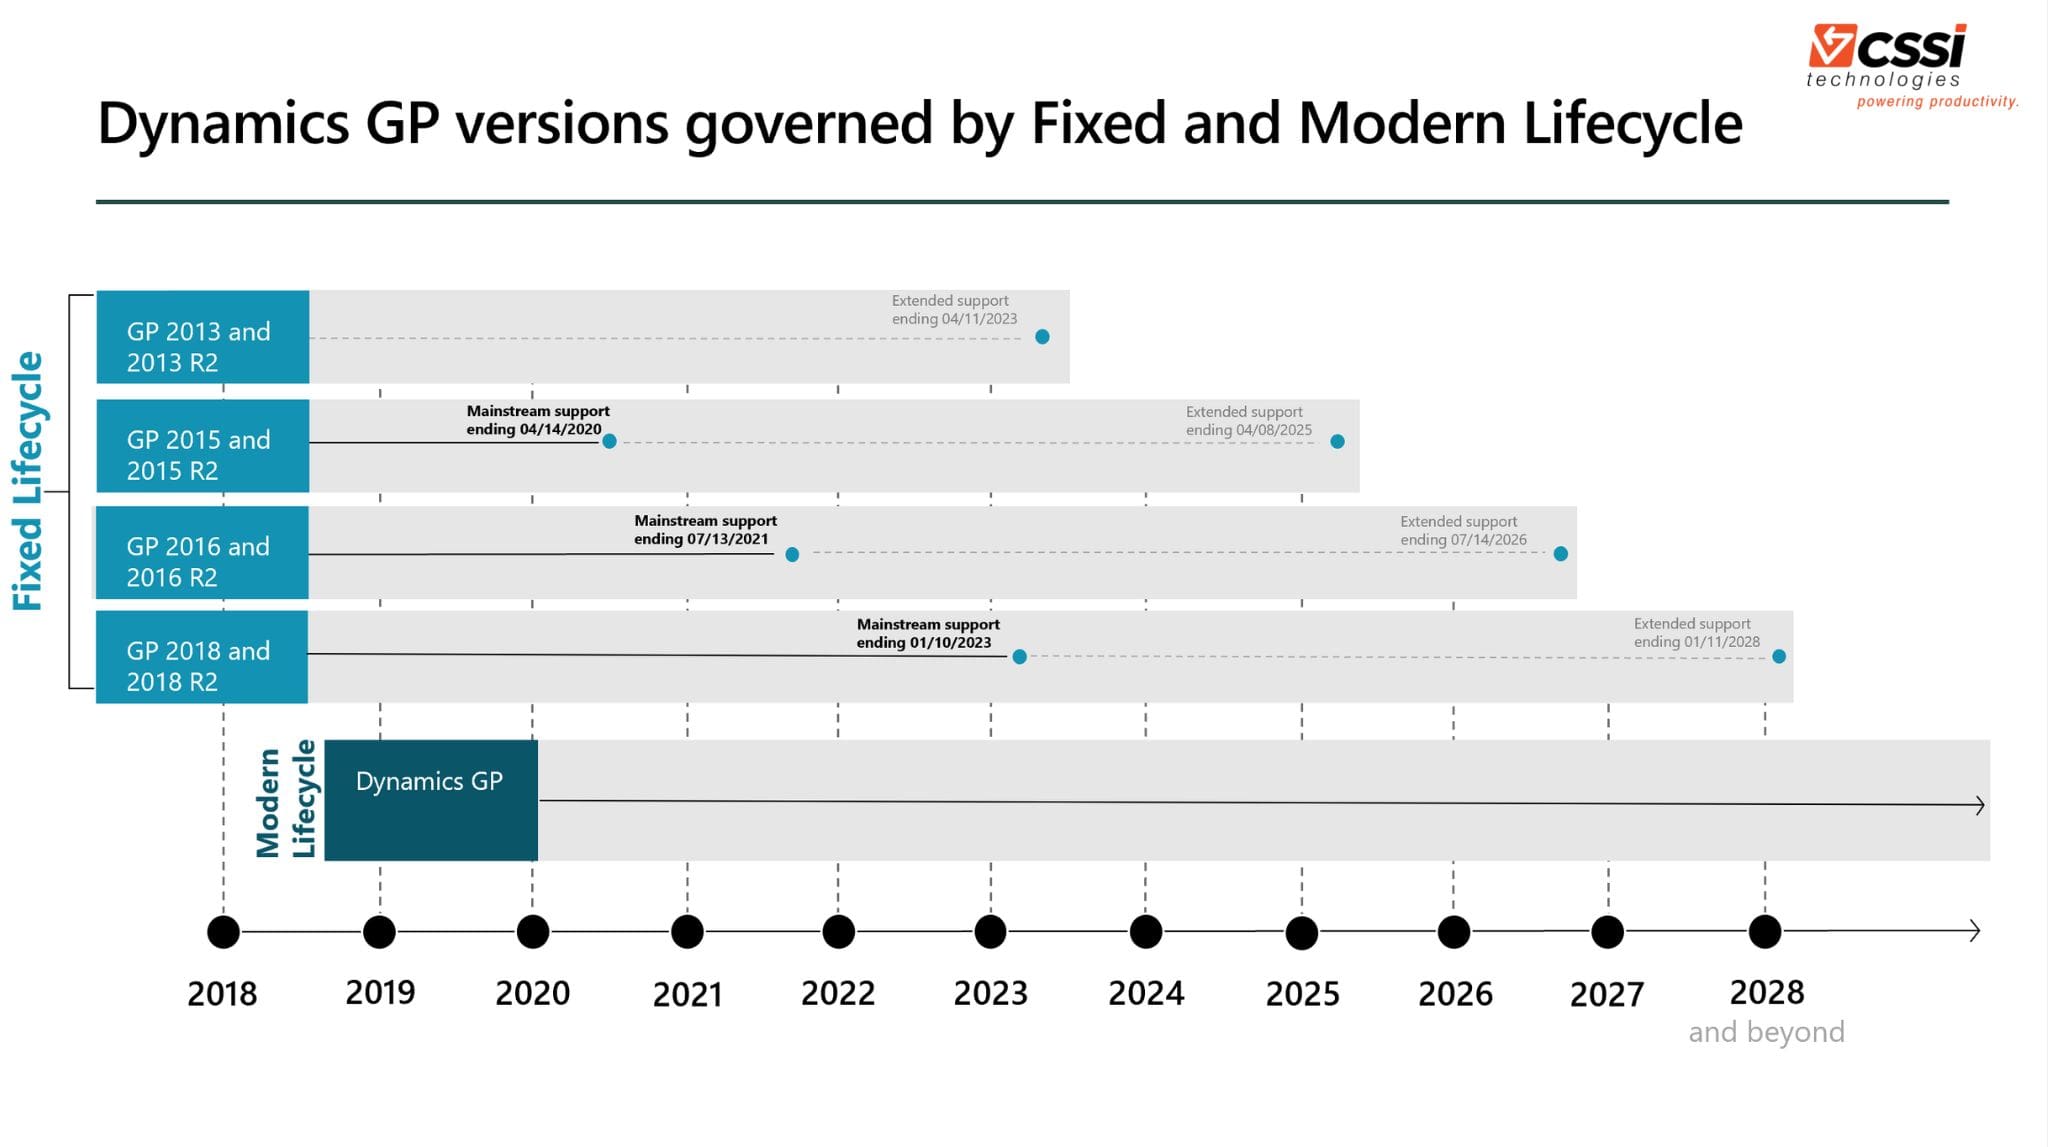
Microsoft has clearly and repeatedly committed to supporting GP to 2028 and beyond. In 2019, Microsoft adopted a ‘modern lifecycle’ system under which there are annual updates and patches to GP. These will support your annual GP update, with which CSSI can be of help. See the chart below for the current Microsoft Dynamics GP roadmap, which shows the transition from the fixed lifecycle policy to the modern lifecycle policy:
Microsoft’s well-known GP spokesperson Terry Heley has spoken and written frequently on the topic of the ‘future of GP’. She put together a detailed explanation of the future of Microsoft Dynamics GP, which is available here:
https://community.dynamics.com/gp/b/dynamicsgp/posts/microsoft-is-fully-committed-to-supporting-our-dynamics-gp-customers-for-years-to-come
Third-Party Add-On Ecosystem Supports Microsoft GP
One of the attractive things about GP is the massive platform of third-party accounting software add-ons which enhance GP’s core functionality. For example, a Dynamics GP partner like CSSI offers warehouse management software (WMS) which integrates with GP. GP users have come to heavily rely on these add-on products, which in many cases have been highly customized for their particular business. Many of these add-ons are unavailable for Business Central even if Microsoft Dynamics GP customers were willing to make the major investment in migrating to a new ERP system.
The Microsoft partner community continues to be attentive to the needs of Dynamics GP users, and continues to enhance and improve their products. So while it is true that GP is unlikely to add any new core modules, that is rather irrelevant… because additional functionality continues to be available through add-on products.
CSSI Continues To Support Dynamics GP
CSSI will continue to provide Dynamics GP support for years to come, providing technical support, upgrades, customer service, and consulting. We are a Microsoft Dynamics GP partner happy to continue a long tradition of assisting the many long-time GP users with whom we work. Please contact us if you have any questions.