Gather the data you need on one screen with all-in-one views
Here’s how to use GP’s Purchasing, Sales and Inventory All-In-One Views to view all documents related to a particular vendor, customer or inventory item. (Available in the Inquiry section of each page.)
Creating all-in-one views:
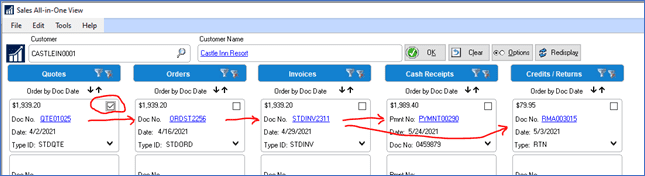
The screenshot below shows the Sales All-In-One Views. Here you can see Quotes, Orders, Invoices, Cash Receipts and Credits/Returns for one customer.

- Use the “Order by” up and down arrows to change the sort order in each section.
- Add or remove a filter in each section by clicking on the filter icons.
- Click on the Options button to choose which types of documents you want to display.

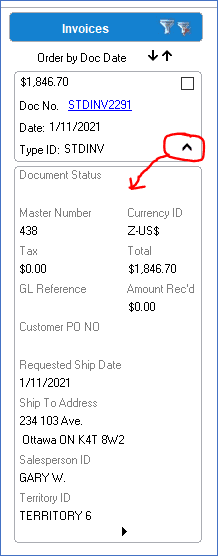
- Click on down arrow in a box to see more details about that document
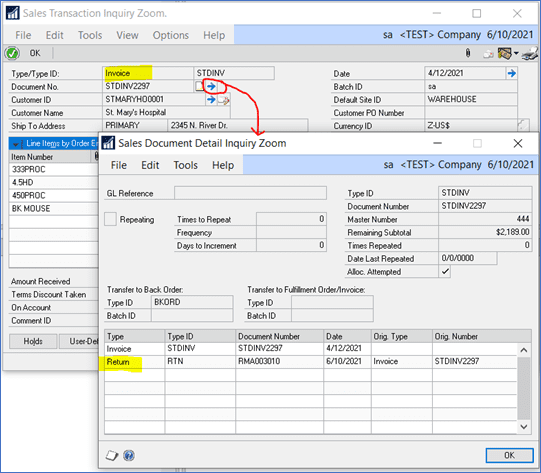
- Click on a checkox to see all the related documents for that one transaction. In the example below, Quote QTE01025 was checked and we can then see the quote was transferred to Order ORDST2256, which was transferred to Invoice STDINV2311. You can also see the Return and the Payment that were applied to that invoice.
How cool is that???
We hope you found this tip useful. Contact CSSI for personalized GP support and training.