GP Tip: Taking Non-Qualifying Vendor Discounts
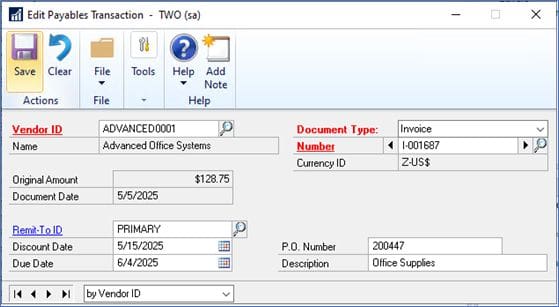
As you know, GP will only automatically deduct vendor terms discounts if you are paying invoices before or on their discount dates.
You can also take discounts AFTER the discount date by checking “Take Non-Qualifying Discounts” box in the Build Payment Batch window.
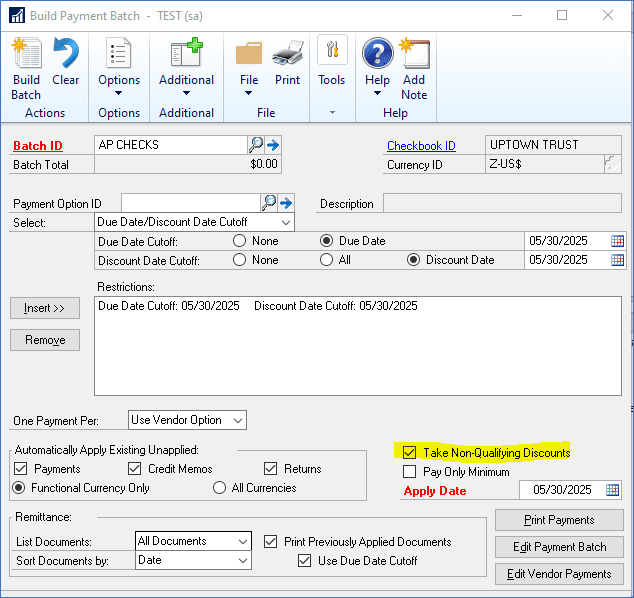
This option is not available if you mark the Exclude Expired Discounts from Payments option in the Payables Management Setup window (shown below) or for a purchasing prepayment batch.
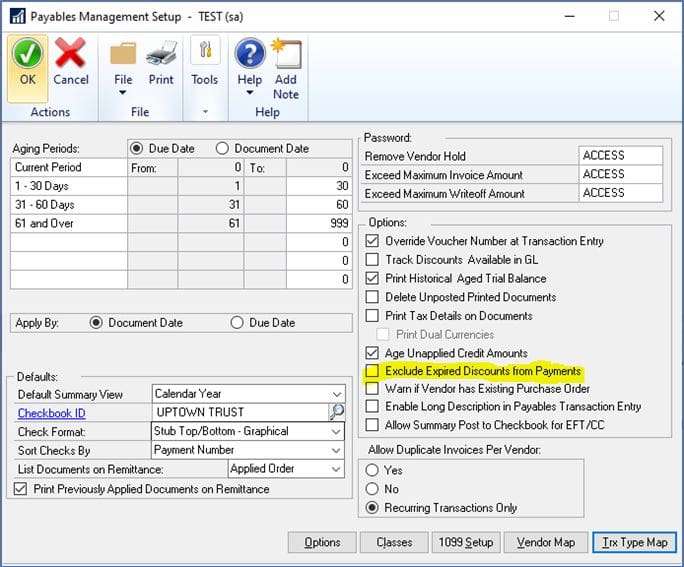
Another helpful option in the setup window above is “Allow Summary Post to Checkbook for EFT/CC”. This feature was added in GP 18.5. It allows you to post EFT and credit card AP payment batches to the bank reconciliation in a lump sum, rather than as individual amounts. This makes bank reconciliation much easier because these amounts most likely appear on your bank statement as a total amount.
Need GP Help?
CSSI is available for GP support and training. Let our experts help you improve your GP setup. Please contact us for help.