On-Demand Webinar – Analytics! Empower Your Users With Power BI
Are you excited about data? Data increasingly provides a competitive advantage to today’s leading organization. How effectively are you utilizing data within your organization?
Do the right people have easy access to the data they need to make decisions?
Do you have informative, easy-to-share dashboards in place to monitor business results?
Are your reports flexible and dynamic? Are non-technical users able to slice and dice the data?
Are you able to tie together and compile data stockpiled in various databases throughout your organization?
If the answer to any or all of the above is “no”, then how much could you improve your business by turning “no” to “yes”?
In the following webinar, we discuss the power of analytics and Microsoft’s Power BI software, a tool which puts powerful analytical capabilities in the hands of even non-technical users. Power BI enables you to create dashboards and dynamic reports, pushing data down to the users who need it.
Learn more about how CSSI can help you utilize and implement Power BI:
In this video, CSSI present Dynamics GP Intermediate Management Reporter Training. We step up the difficulty level and address some of the more sophisticated things you can do with this tool.
In this Management Reporter Intermediate tutorial, we address:
Report building blocks logic – column definition, etc.
Organizing the report library into folders
How to get percentage columns into a report
Exporting data to a Microsoft Excel spreadsheet
Adjusting fonts, styles, and colors
What are format codes?
BASE, CBR, and other fun codes
Creating a new report from scratch.
Some of the many great uses for Management Reporter:
Balance Sheet
Income statement
Cash flow statement
Trial balance
Accounts Receivable
Account Payable
Need support with Dynamics GP on other topics such as using the smartlist builder, GP training, SQL server management and optimization, SSRS Reports (SQL Server Reporting Services), or upgrading your version of GP? Learn more about how CSSI can help you on these topics as well as GP’s Management Reporter:
Learn more about how CSSI can help you with GP’s Management Reporter:
Did you miss the first webinar in this series, Management Reporter for Beginners? Click here to view.
Did you miss our GP team’s most recent webinar on the topic of “Year-End processing tips for Dynamics GP?” Now you can watch the webinar on demand. Check it out:
Need help with year-end processing in Dynamics GP?:
Dynamics GPManagement Reporter for Beginners FAQ
Microsoft’s Management Reporter tool can be extremely useful for Dynamics GP users to create a financial report such as balance sheet , trial balance , income statement , and really any kind of financial statements . Here are answers to several frequently asked questions about the Microsoft Dynamic GP Management Reporter tool:
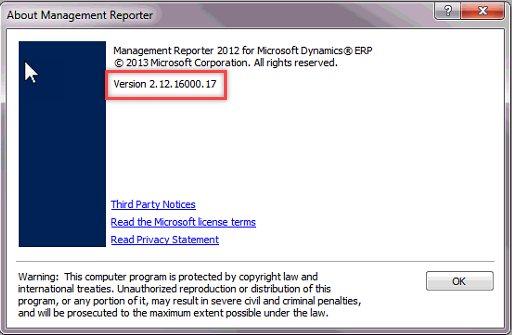
What’s the most current version of Microsoft Management Reporter available? The most current version of Management Reporter is Management Reporter 2012. It’s the Cumulative Updates (service pack update versions) that you want to keep your eye on since it’s unclear as to whether there will be full future versions of Management Reporter released. The most current version and service pack (CU16) is: 2.12.16002.0
What version of Management Reporter will work with my current Dynamics GP version? We’re so glad you asked! It does make a difference. Here are the versions of GP that the most current version of Management Reporter will work with: GP 2013 GP 2013 R2 GP 2015 GP 2015 R2 GP 2016 GP 2016 R2 GP 2018
If you’re thinking about using Management Reporter or upgrading GP, be sure to investigate version compatibility. Not sure where to find this information? Contact us at support@cssi.com and we’ll help you find the information you need.
What if I’d like to upgrade Management Reporter? Contact us atsupport@cssi.com for more information. We’re happy to help you out! We can also support and train you on report design, using this report designer to create multiple reports, and setting up your data warehouse / management reporter database.
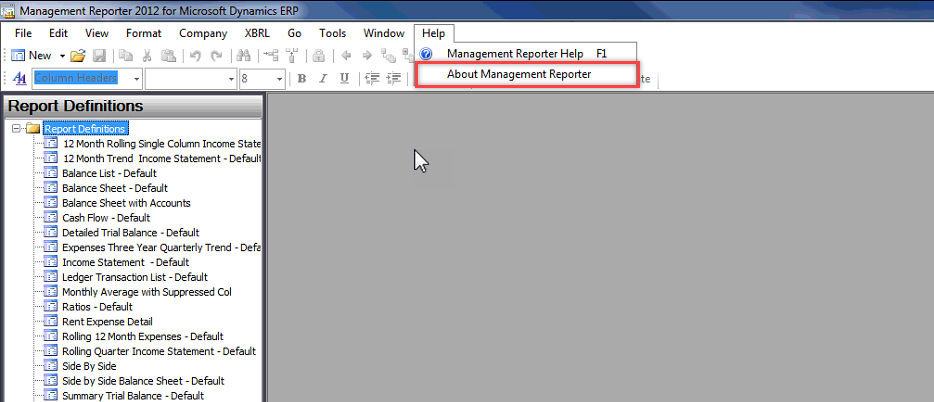
How do I know what version of Management Reporter my organization is currently running? In Management Reporter, click on Help and select About Management Reporter
On the About Management Reporter screen, look for the version information:
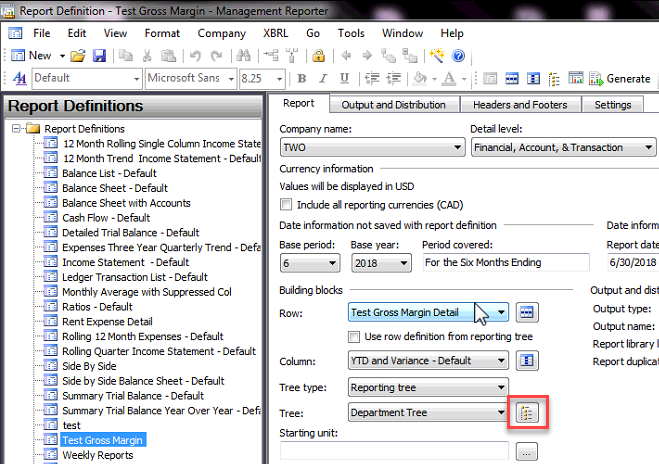
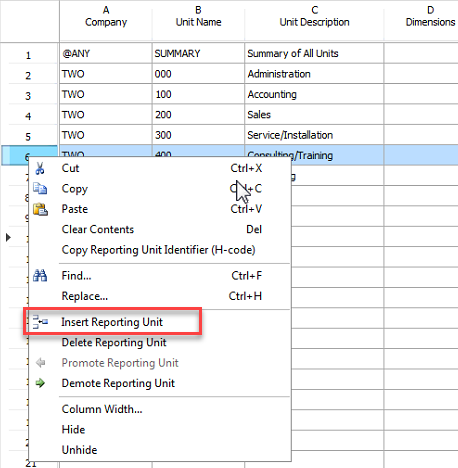
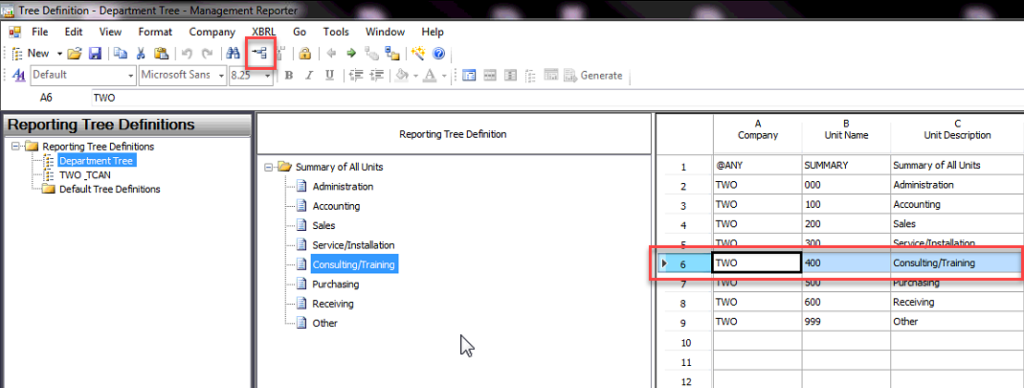
Is there more than one way to add a row to the reporting tree in Management Reporter? a) Right-click and select to insert the new row amongst existing rows: Click to edit the reporting tree:
Right-click where you’d like to add the new row and select Insert Reporting Unit:
b) Select the row where you’d like to insert the new row and click the Insert Row button:
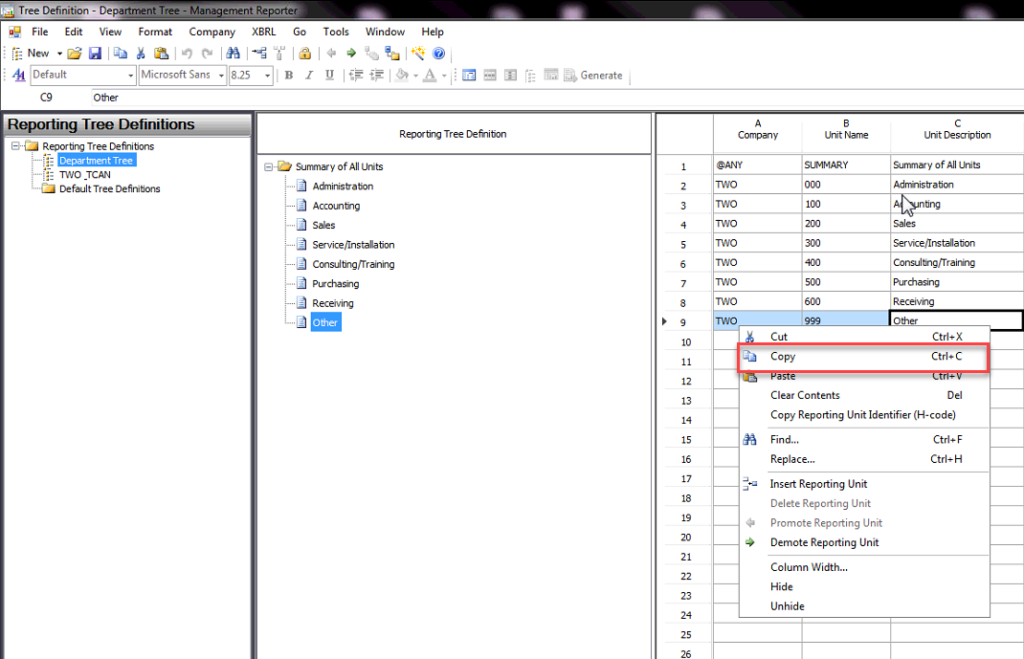
c) Copy and paste an existing row Right-click and Copy the row you’d like to duplicate and then right-click and Paste where you’d like it to be inserted
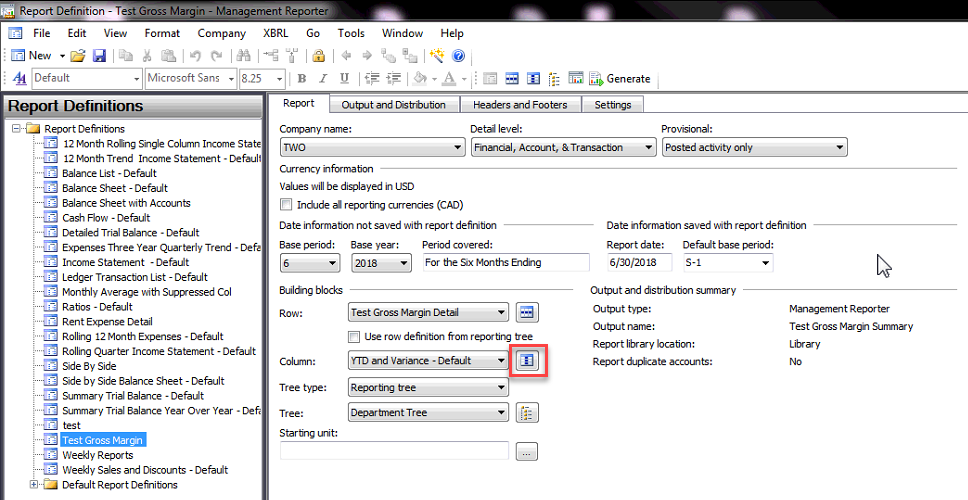
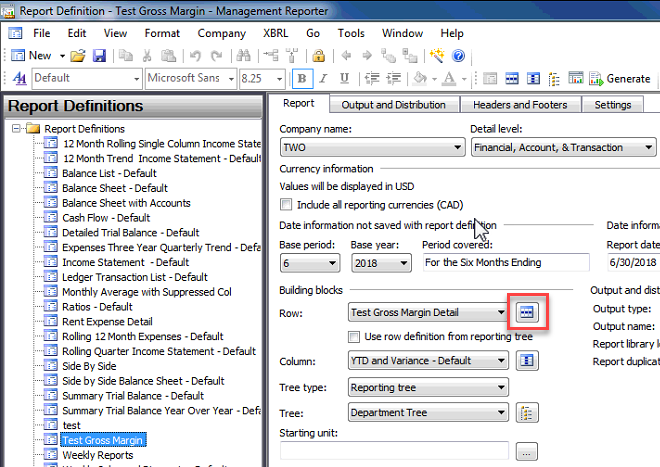
Most times I need to see results for the year so far, and other times I just want to see results for the current month. How do I change the timeframe for which an individual report runs? a) On the Report tab, you can specify which month you’d like set as your Base Period.
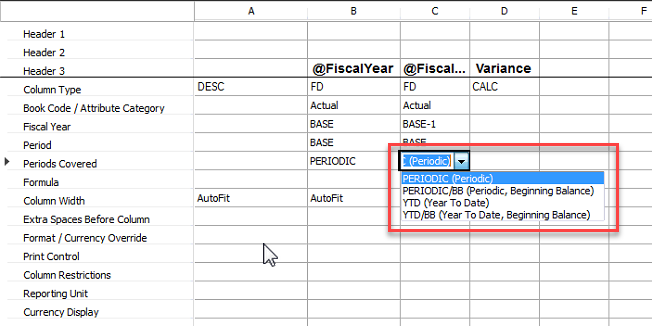
b) Click the Column details icon. c) In the Periods Covered field(s), select whether you want the fields to register as YTD (Year to Date) or PERIODIC (Periodic). YTD will show any data from the beginning of the year up to the month you’ve selected as your Base period. Periodic will show data only for the month you’ve selected as your Base period.
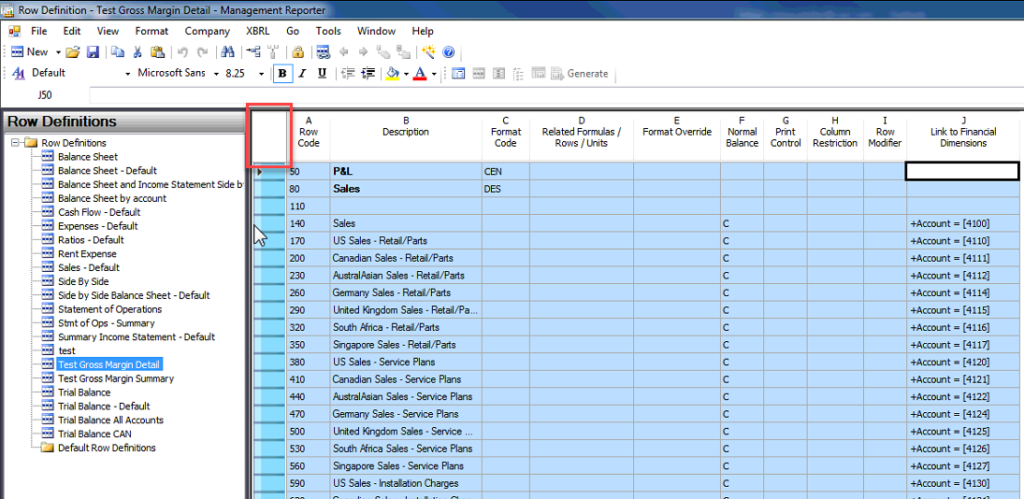
It’s easier for me to review field mappings in Microsoft Excel. What’s the easiest way for me to review the row definitions in Excel? a) On the Report tab, select the Rows details icon.
b) Copy the data fields in the Row Definition
Pro Tip: Instead of trying to manually select and copy all the fields, just double-click in the square in the top-left corner of the fields. It will auto-select all data fields in a snap!
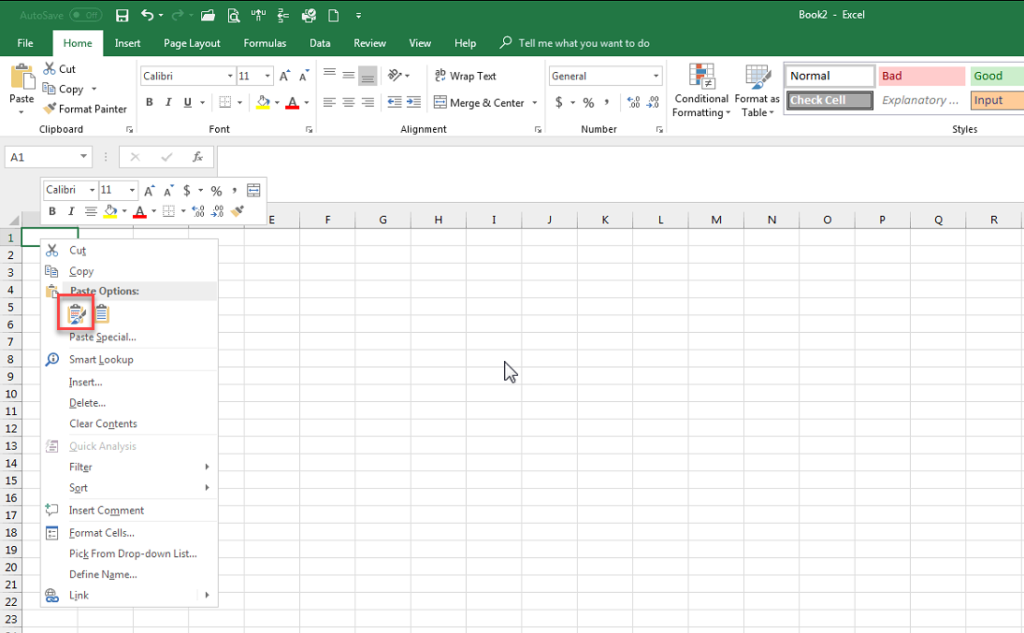
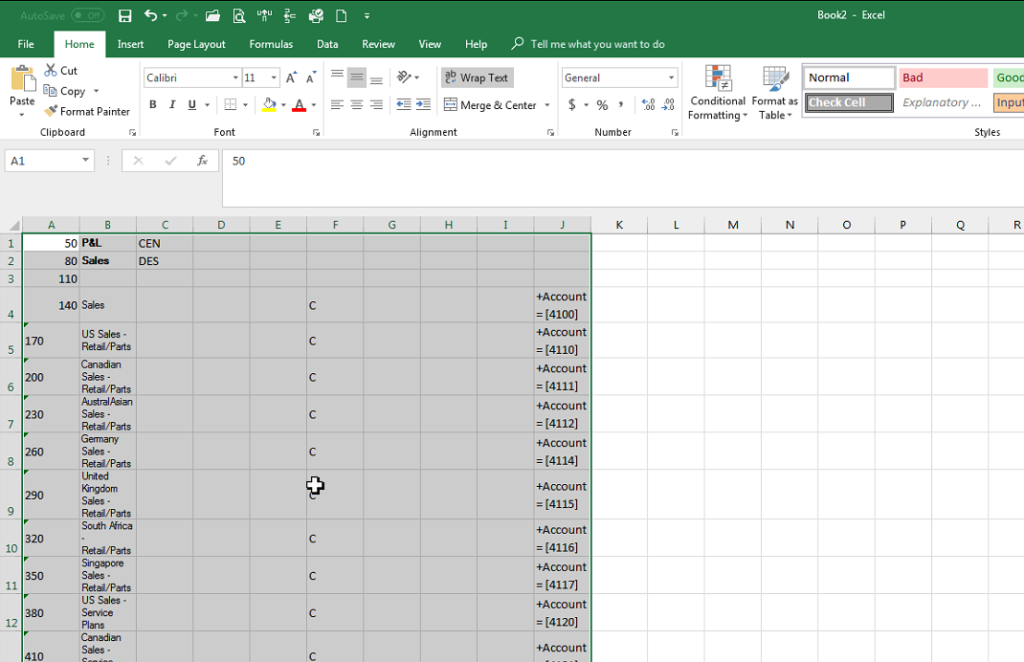
c) Open a New Excel Book and paste the data.
Training GP Management Reporter Training Videos
Your Next Steps
Want to learn more about Dynamics GP, receive Management Reporter training, or learn how to create financial statements such as a balance sheet in MR? Join our GP mailing list:
Management Reporter is a powerful interactive financial reporting tool used with Microsoft Dynamics GP and other ERP systems. Management Reporter allows Controllers, Accountants, and other Finance team members to create custom reports without the help of their IT team. Ease of use, native Active Directory integration, and scalability are just a few of the reasons why Management Reporter is a great reporting and financial statement tool.
In this recorded webinar, the CSSI Technologies GP team provides a tutorial on Dynamics GPManagement Reporter tutorial for beginners. This is part 1 of a 2 part series (see part 2 here – Intermediate Management Reporter Tutorial).
This Dynamics GPManagement Reporter tutorial includes:
Management Reporter overview
Report structure – report definition and how to build a report
Running reports – sample report outputs, and how to export reports to Microsoft Excel
Management Reporter can be used as a report designer for many different types of financial data reports:
CSSI can support you with report creation and training using Management Reporter, Power BI, and SSRS (SQL Server Reporting Services) and other tools. Interested to learn how CSSI Technologies can help to support your Dynamics GP usage, or to learn about future webinars? Contact us:
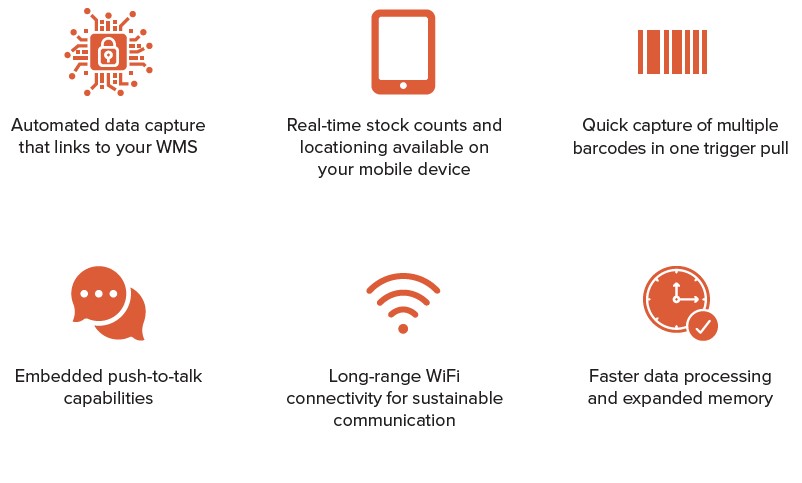
WMS by CSSI is warehouse management software for Dynamics GP. Whether you are implementing your first warehouse management software, or you are seeking to upgrade a Windows Mobile-based system to a system which can work with the Android OS, you will want to take a good look at WMS by CSSI. This is our new warehouse management software specifically developed to run on Android. We baked all of the essential WMS functionality into a tool which is also flexible and customizable — CSSI’s custom software development team can work with you to create a true custom-fit solution.
Do you have an existing WMS? Does it run on Windows Mobile devices? Microsoft will end support for Windows Mobile on 01/14/2020, which means that handheld computers running this OS will not have the support for bugs and viruses which you require as an enterprise user. If your WMS does not accommodate Android devices, speak to CSSI to learn about your options.
Have you ever thought that you could save time (and wasted clicks) by customizing your GP home page to suit your specific needs? Did you know that it is indeed possible?
The CSSI GP team has prepared this brief tutorial to show you how…
How to customize your GP Home Page
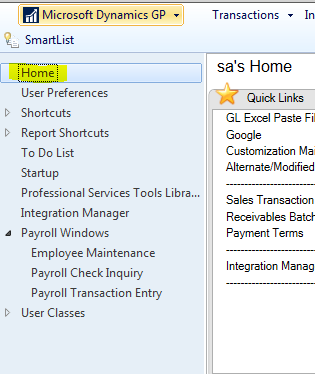
1 – How to change Navigation Pane Options
Did you know that you can remove navigation pane options that you never use? Or, that you can rearrange them?
Click on the small double right arrow in the lower right-hand corner of the Navigation pane and select Navigation Pane Options.
Uncheck the options you don’t want to appear and/or select an option and click on the Move Up or Move Down buttons. Click on OK when finished.
2 – How to customize the Toolbar
You can add icons to the toolbar at the top of the GP screen for easy access to many GP windows
Click on the Layout icon in the upper right-hand corner or press Alt+L or right-click in the blank space of the toolbar. (This is where you can also choose whether or not to display the Navigation pane.)
The Main option displays Transactions, Inquiry, Reports and Cards
The Standard option displays SmartList, Task List, Reminders and My Reports
Select any of the module options to display transaction entry and posting icons for each module
To add any other icons, put a checkmark beside the Custom option. Bring up the Layout menu again and select Customize.
Choose which toolbar to modify then click on Add to find the window to be added.
In the Controls box, select an item then click on Modify Selection to change a Name, change a button image, insert a divider line and select to display Image Only, Text Only or Image and Text.
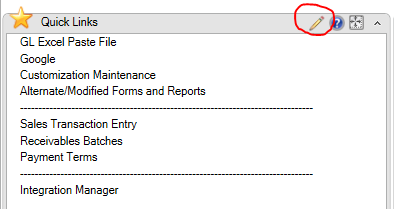
3 – Quick Links
Add Quick Links to display links to GP window, web pages and/or external files (such as Excel or Word documents)
Move the cursor over the Quick Links bar and select the pencil icon
Click on Add and choose an option in the drop-down list
Click on Modify to change the name of an existing quick link
Use the Move Up and Move Down buttons to rearrange quick links
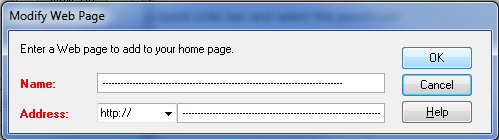
To insert a divider line, click on Add > Web page and fill in dashes in the Name and Address fields. Use the Move buttons to rearrange the position of the divider line.
4 – Shortcuts
Shortcuts are displayed in the upper part of the Navigation Pane on the Home Page. Use Shortcuts for quick access to any GP window, SmartList Favorite, GP Macros, Web Pages or External Applications.
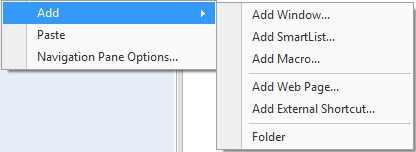
Right-click anywhere in the blank space of the Shortcut bar and select Add. Select an Add option.
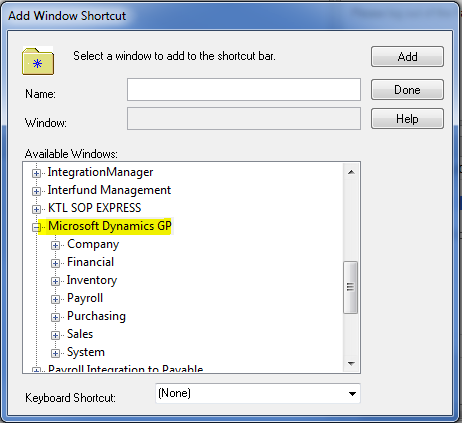
Choose Add Window to add a GP window. Scroll down and click on the plus sign to the left of Microsoft Dynamics GP. Expand a module to find and select a window within that module. Click on Add then Done.
You can also add windows from any GP add-on modules or third-party products.
Add Folders to organize your shortcuts
5 – My Reports
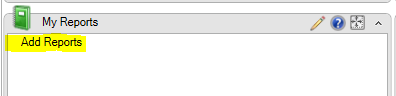
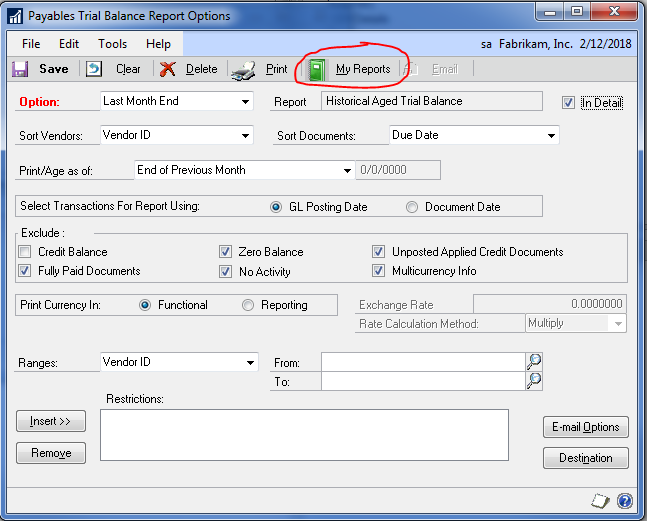
You can add reports to the My Reports section of the Home page in one of two ways: (1) from the Home Page or (2) from within a Report Option
To add a report from the Home page, click on the Add Reports link
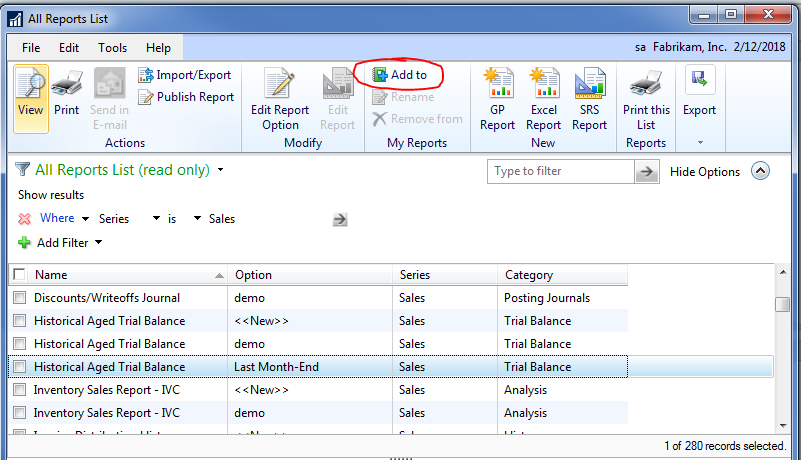
To add a report from within a Report Option, click on the My Reports option.
FYI:The due date for providing Forms 1095-C to employees was extended to March 2, 2018. The IRS filing deadline of forms 1094-C & copies of the 1095-Cs remains the same: paper filing needs to be done by Feb 28, 2018 and electronic filing (required for employers with more than 250 1095-Cs) must be done by April 2, 2018.
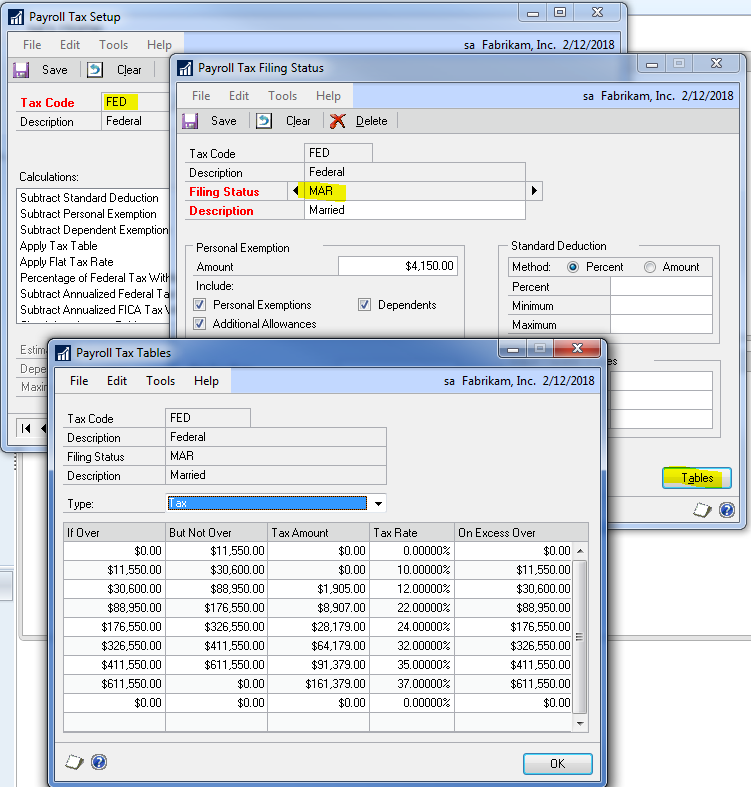
Or, if you edited the tax tables manually, here’s a screenshot of the Married Annual FED tax table.
Do you have questions? Contact CSSI at 570-524-4424
Interested to learn more about customizing your GP home page and other useful tips for GP? Need GP support from CSSI Technologies? Contact us:
It’s that time of year… time to update GP with payroll tax tables for 2018. The team at CSSI prepared this brief tutorial to help you get it done right the first time.
To download and print these instructions, click here: [Download not found]
How to update GP Payroll Tax Tables
1 – Have all users log out of GP
2 – Log into GP as the ‘sa’ user
3 – Go to Microsoft Dynamics GP > Maintenance > U.S. Payroll Updates > Check for Tax Updates
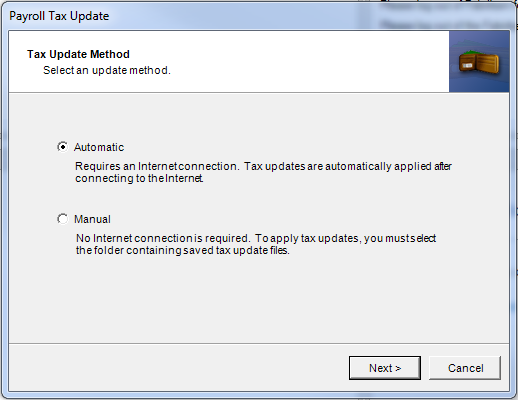
4- Select the Automatic method then click Next
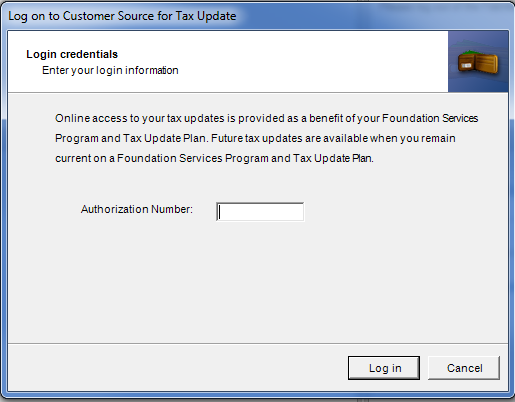
5 – Enter your Authorization Number. This is your Authorized number with CustomerSource, which is normally your phone number (with the area code and no punctuation). Click on Login.
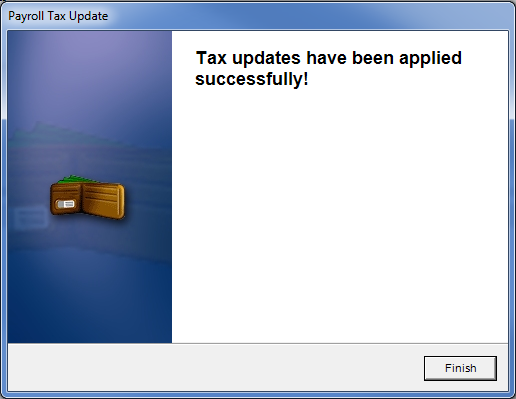
6 – The tax tables will update. Click on Finish after the updates have been applied successfully.
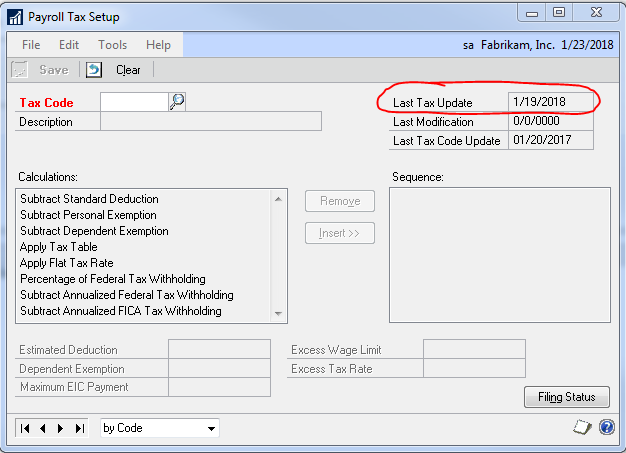
7 – You can verify that you have the latest tax update by going to Microsoft Dynamics GP > Tools > Setup > System > Payroll Tax. The “Last Tax Update” field should have the date of 1/19/18.
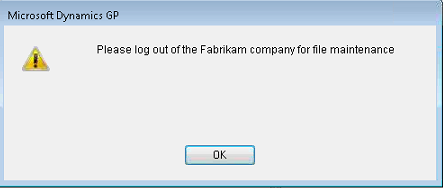
Note: If you receive the error below when trying to run the update, close out of GP then right-click on the GP icon and select Run as Administrator.
Do you have questions? Contact CSSI at 570-524-4424
Interested in receiving more tips, tricks and advice for Dynamics GP? Join our mailing list…
It’s the end of the year and you are trying to encourage your Microsoft Dynamics GP users into staying logged out of company related windows as you work to complete year-end close. You send blast emails, make calls and even send a few instant messages to schedule the process, yet you still find that there are folks that just didn’t get the memo. This same scenario also crops up when you try to perform file maintenance, even though it is often scheduled and thoroughly communicated. After the battery of unread emails, missed calls and so on, you find yourself wishing there was an easier way.
Microsoft heard your pleas and added a feature in Microsoft Dynamics GP 2013 R2 that allows you to take a company offline. This should help keep your busy bee Microsoft Dynamics GP user’s company activity to a minimum during year-end close and for file maintenance. Continuing to schedule these procedures along with this feature should help minimize interruptions and frustration.
As you know, new features are released all the time in the software world. Mass emails are typically sent out to make users aware of the changes, the benefits, and how they can increase productivity. But new tools are only beneficial if you know how to use them, and we all know that between meetings, conference calls, and other things that flood our busy workday, it’s not always easy to keep up.
CSSI Technologies is here to help. We’ve created an easy-to-use, comprehensive guide on how to take a company offline in Microsoft Dynamics GP.
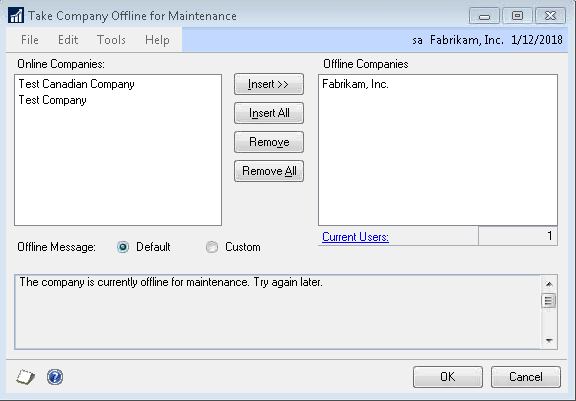
1) Start by going to Administration > Utilities >System >Take Company Offline. Select a company and click on the Insert button to move the company to the Offline Companies section. You can insert multiple companies one at a time, or use the Insert All button to insert all companies.
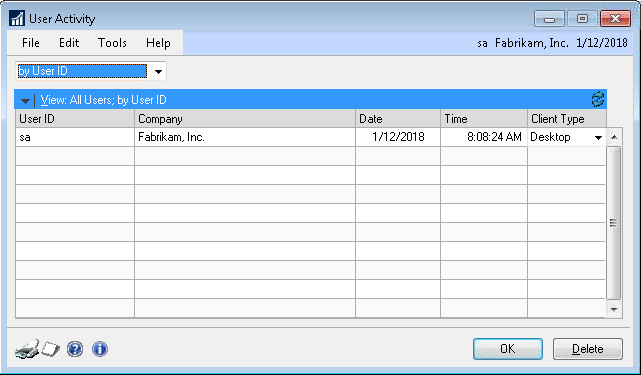
Pro Tip: When you select a company in the Offline Companies list, you can see how many Current Users are logged into that company. Click on the blue hyperlink “Current Users” to see the list of User ID’s.
2) You can establish a message that will be shown to any user that attempts to log in to a company after it has been taken offline. Select “Default” to utilize the default message, or “Custom” to provide additional information to users. Users that are currently working in the company until they log out. Once they log out, they will only be able to log back in to the company if they have offline access.
3) Once you are finished, click on the OK button in the bottom right-hand corner.
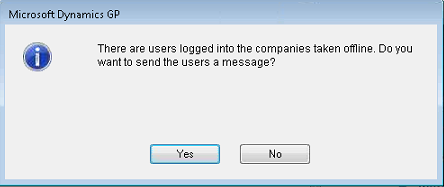
If users are logged into the companies that are being taken offline, a message appears asking if you would like to send those users a message.
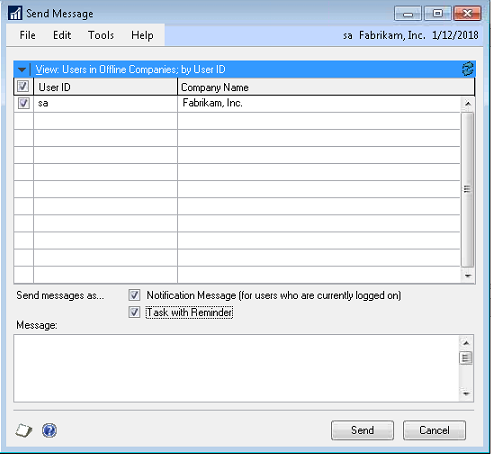
4) If you click “Yes,” the Send Message window appears.
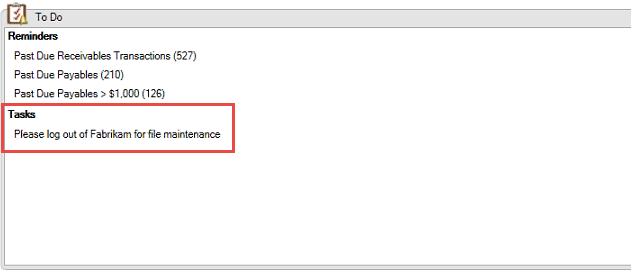
5) Users will see either a “Task” on their Homepage:
Or they will receive a popup message:
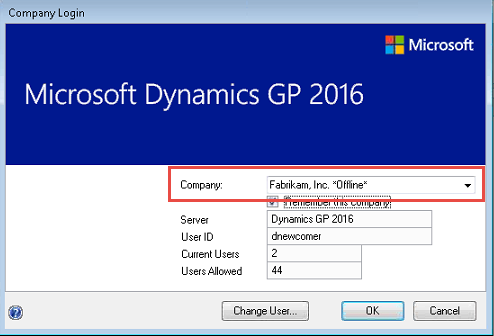
6) When users try to log back in, it will be indicated that the company is offline in the Company name:
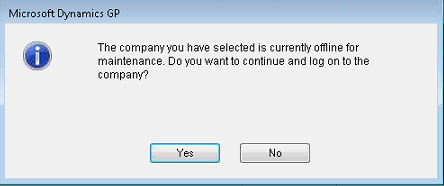
7) If they select the offline company, they will receive this message:
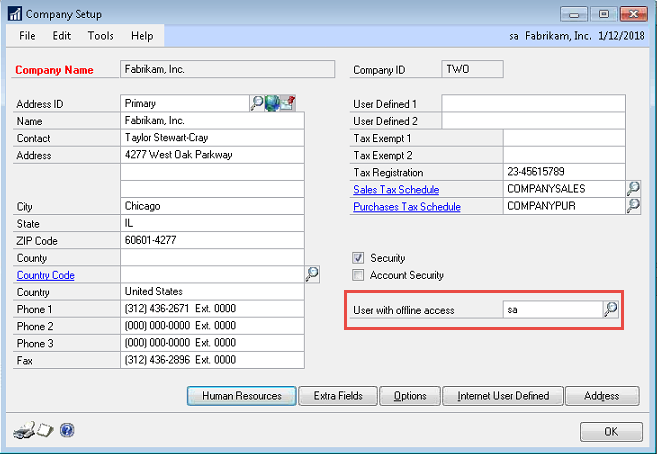
Earlier, we mentioned that the only way a user could continue working in an offline company was if they were granted offline access. Here’s how to grant a user offline access:
8) Go to Microsoft Dynamics GP > Tools > Setup > Company > Company. Once you’re on the Company Setup screen, specify the user you would like to set up by entering the User ID in the “User with offline access” field. Be sure to click OK in the bottom right-hand corner to save your changes.
While this feature is very easy to configure, the CSSI team still recommends scheduling year-end close and file maintenance. With the support of our team and this Microsoft Dynamics GP feature, we hope that your year-end and scheduled file maintenance procedures will become frustration free and painless. If you have any questions, our Microsoft Dynamics GP support team is always happy to help! We can be reached at support@cssi.com or at 570-524-4424.
Did you find this GP info helpful? Join our mailing list for more pro tips and info…
Microsoft Dynamics GP users — it’s time for year-end processing. To help you out, the GP team at CSSI has prepared an update guide with a whole bunch of notes and time-saving tips. Our free Microsoft Dynamics GP Year-End Processing Guide contains tips and guidance on:
What to do before your year-end close
Recommended order for closing sub-ledgers
Modules which are mandatory vs. optional for year-end closing
Notes on tax-table updates
Click here to get your free download:
[Download not found]
CSSI is a certified Microsoft Dynamics GP partner with over 25 years of experience supporting Great Plains ERP users in Pennsylvania, Delaware, Maryland, New Jersey and New York. CSSI works with GP users in a broad range of industries, such as manufacturing, distribution, warehousing, construction, hospitality, healthcare and education. CSSI’s team of experienced GP and accounting professionals is complemented by teams dedicated to custom software development as well as auto ID (barcoding and RFID) and mobile computing technologies.