
Field Level Security In GP
This is a tool that’s been around forever but is hardly ever used. This allows you to control user access and edit abilities at a field level in Dynamics GP windows.
1. Go to Administration > Setup > System > Field Level Security
2. Click on the Add button at the bottom of the window to create a new ID
3. Enter an ID (15 characters max) and a Description
4. Click on the magnifying glass to the right of Product
5. Click on the plus sign to the left of Microsoft Dynamics GP (or any other product) to expand the list of modules
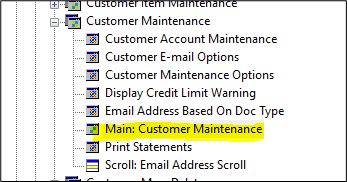
6. Expand a module
7. Expand the window that you want to add a restriction to and select a sub-window.In this example, we’re going to disable/gray out the Hold checkbox in the Customer Maintenance window.
8. Double-click on the Hold field on the right-hand side
9. Select the Disable Field Security Mode
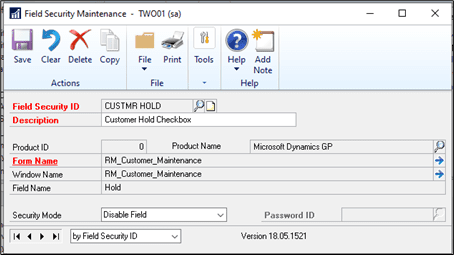
Security Mode Options: Password Before: You must enter a password before getting access to a field Password After: must enter a password after modifying a field for the changes to be saved. Warning Before: A warning will be displayed and access to that field will be denied. Lock Field: You can’t use or modify the field. Disable Field: The field will be displayed but it will be grayed out. Hide Field: The field won’t be displayed. Password Window: You must enter a password before access to the window is permitted. Disable Window: Enter the system administrator’s password to have access to the window. 10. Click on Save
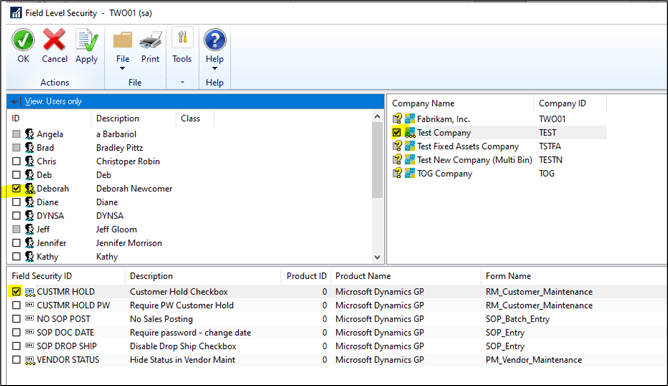
11. Back in the main Field Level Security window, click to select a Company on the right
12. Select a User ID
13. Click on Apply
14. Click on OK
Get Help With GP
Need help of support with GP? Please contact CSSI for expert assistance!